在UE4中的hatching渲染:
基于微软的一篇文章«Real-Time Hatching»,这里做了简化版
主要shader代码片段:
float3 hatchWeight0 = float3(0.0, 0.0, 0.0);
float3 hatchWeight1 = float3(0.0, 0.0, 0.0);
// map tone to palette
if(tone_level > t_5) {
    hatchWeight0.x = 1.0;
} else if(tone_level > t_4) {
    hatchWeight0.x = 1.0 - (5.0 - tone_level);
    hatchWeight0.y = 1.0 - hatchWeight0.x;
} else if(tone_level > t_3) {
    hatchWeight0.y = 1.0 - (4.0 - tone_level);
    hatchWeight0.z = 1.0 - hatchWeight0.y;
} else if(tone_level > t_2) {
    hatchWeight0.z = 1.0 - (3.0 - tone_level);
    hatchWeight1.x = 1.0 - hatchWeight0.z;
} else if(tone_level > t_1) {
    hatchWeight1.x = 1.0 - (2.0 - tone_level);
    hatchWeight1.y = 1.0 - hatchWeight1.x;
} else {
    hatchWeight1.y = 1.0 - (1.0 - tone_level);
    hatchWeight1.z = 1.0 - hatchWeight1.y;
}

//I just use the first 2 weights as pure white and the final 2 as the final texture
//I did this because i only find hatching appealing in deeper shadows and i wanted the most fidelity in falloff areas
//this also lets us use only 1 texture, with the alpha throretically saved for something else.
float hatching = 1 * hatchWeight0.x;
hatching += 1 * hatchWeight0.y;
hatching += hatch_tex.x * hatchWeight0.z;
hatching += hatch_tex.y * hatchWeight1.x;
hatching += hatch_tex.z * hatchWeight1.y;
hatching += hatch_tex.z * hatchWeight1.z;
//multiply over the lighting
//reverse the hatching, multiply by intensity, and then reverse back
return 1-((1-hatching)*hatching_intensity);
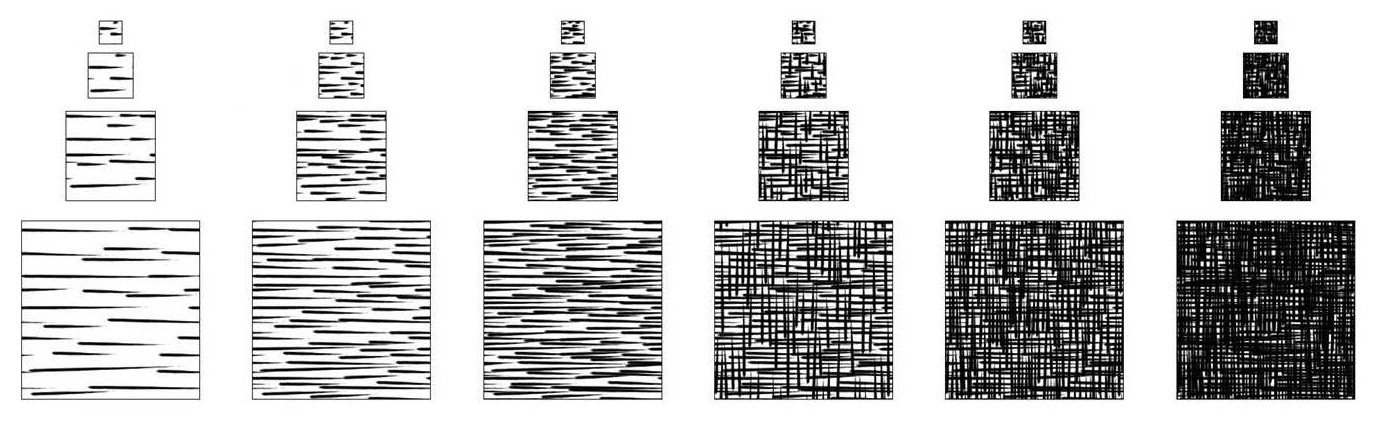
因为hatching的图片是灰度图,可以用两张rgb的图保存6张灰度图,分别存入rgb通道里面,然后通过light intensity分level来读取不同hatching的强度值
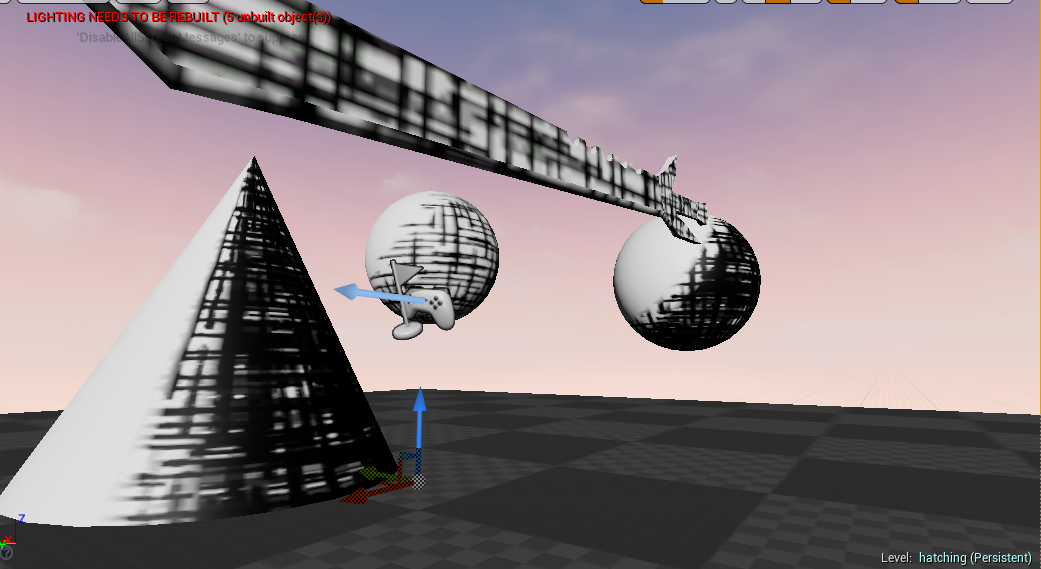
效果不是很理想,进一步的优化应该要过渡自然一些,和加入custom lod。